When you first start learning photography, “ISO” can sound like one of those mysterious technical terms that only pros understand. But once you get the hang of it, ISO becomes one of your best tools for controlling exposure in any lighting situation.
What is ISO?
ISO is one of the three pillars of the exposure triangle, along with shutter speed and aperture. In simple terms, it controls how sensitive your camera’s sensor is to light.
- Low ISO (e.g., 100 or 200) = less sensitivity to light
- High ISO (e.g., 3200 or above) = more sensitivity to light
The higher the ISO, the brighter your photo will be without changing your shutter speed or aperture.
How ISO Affects Your Images
While a higher ISO can help you shoot in darker conditions without blur from a slow shutter, it comes with a trade-off: noise (grainy speckles in the image).
- Low ISO → Clean, crisp images, perfect for bright daylight.
- High ISO → More grain, but essential for low light situations when you can’t slow the shutter or open the aperture any further. The additional grain can be removed with editing software (I use Adobe Lightroom but others are available).
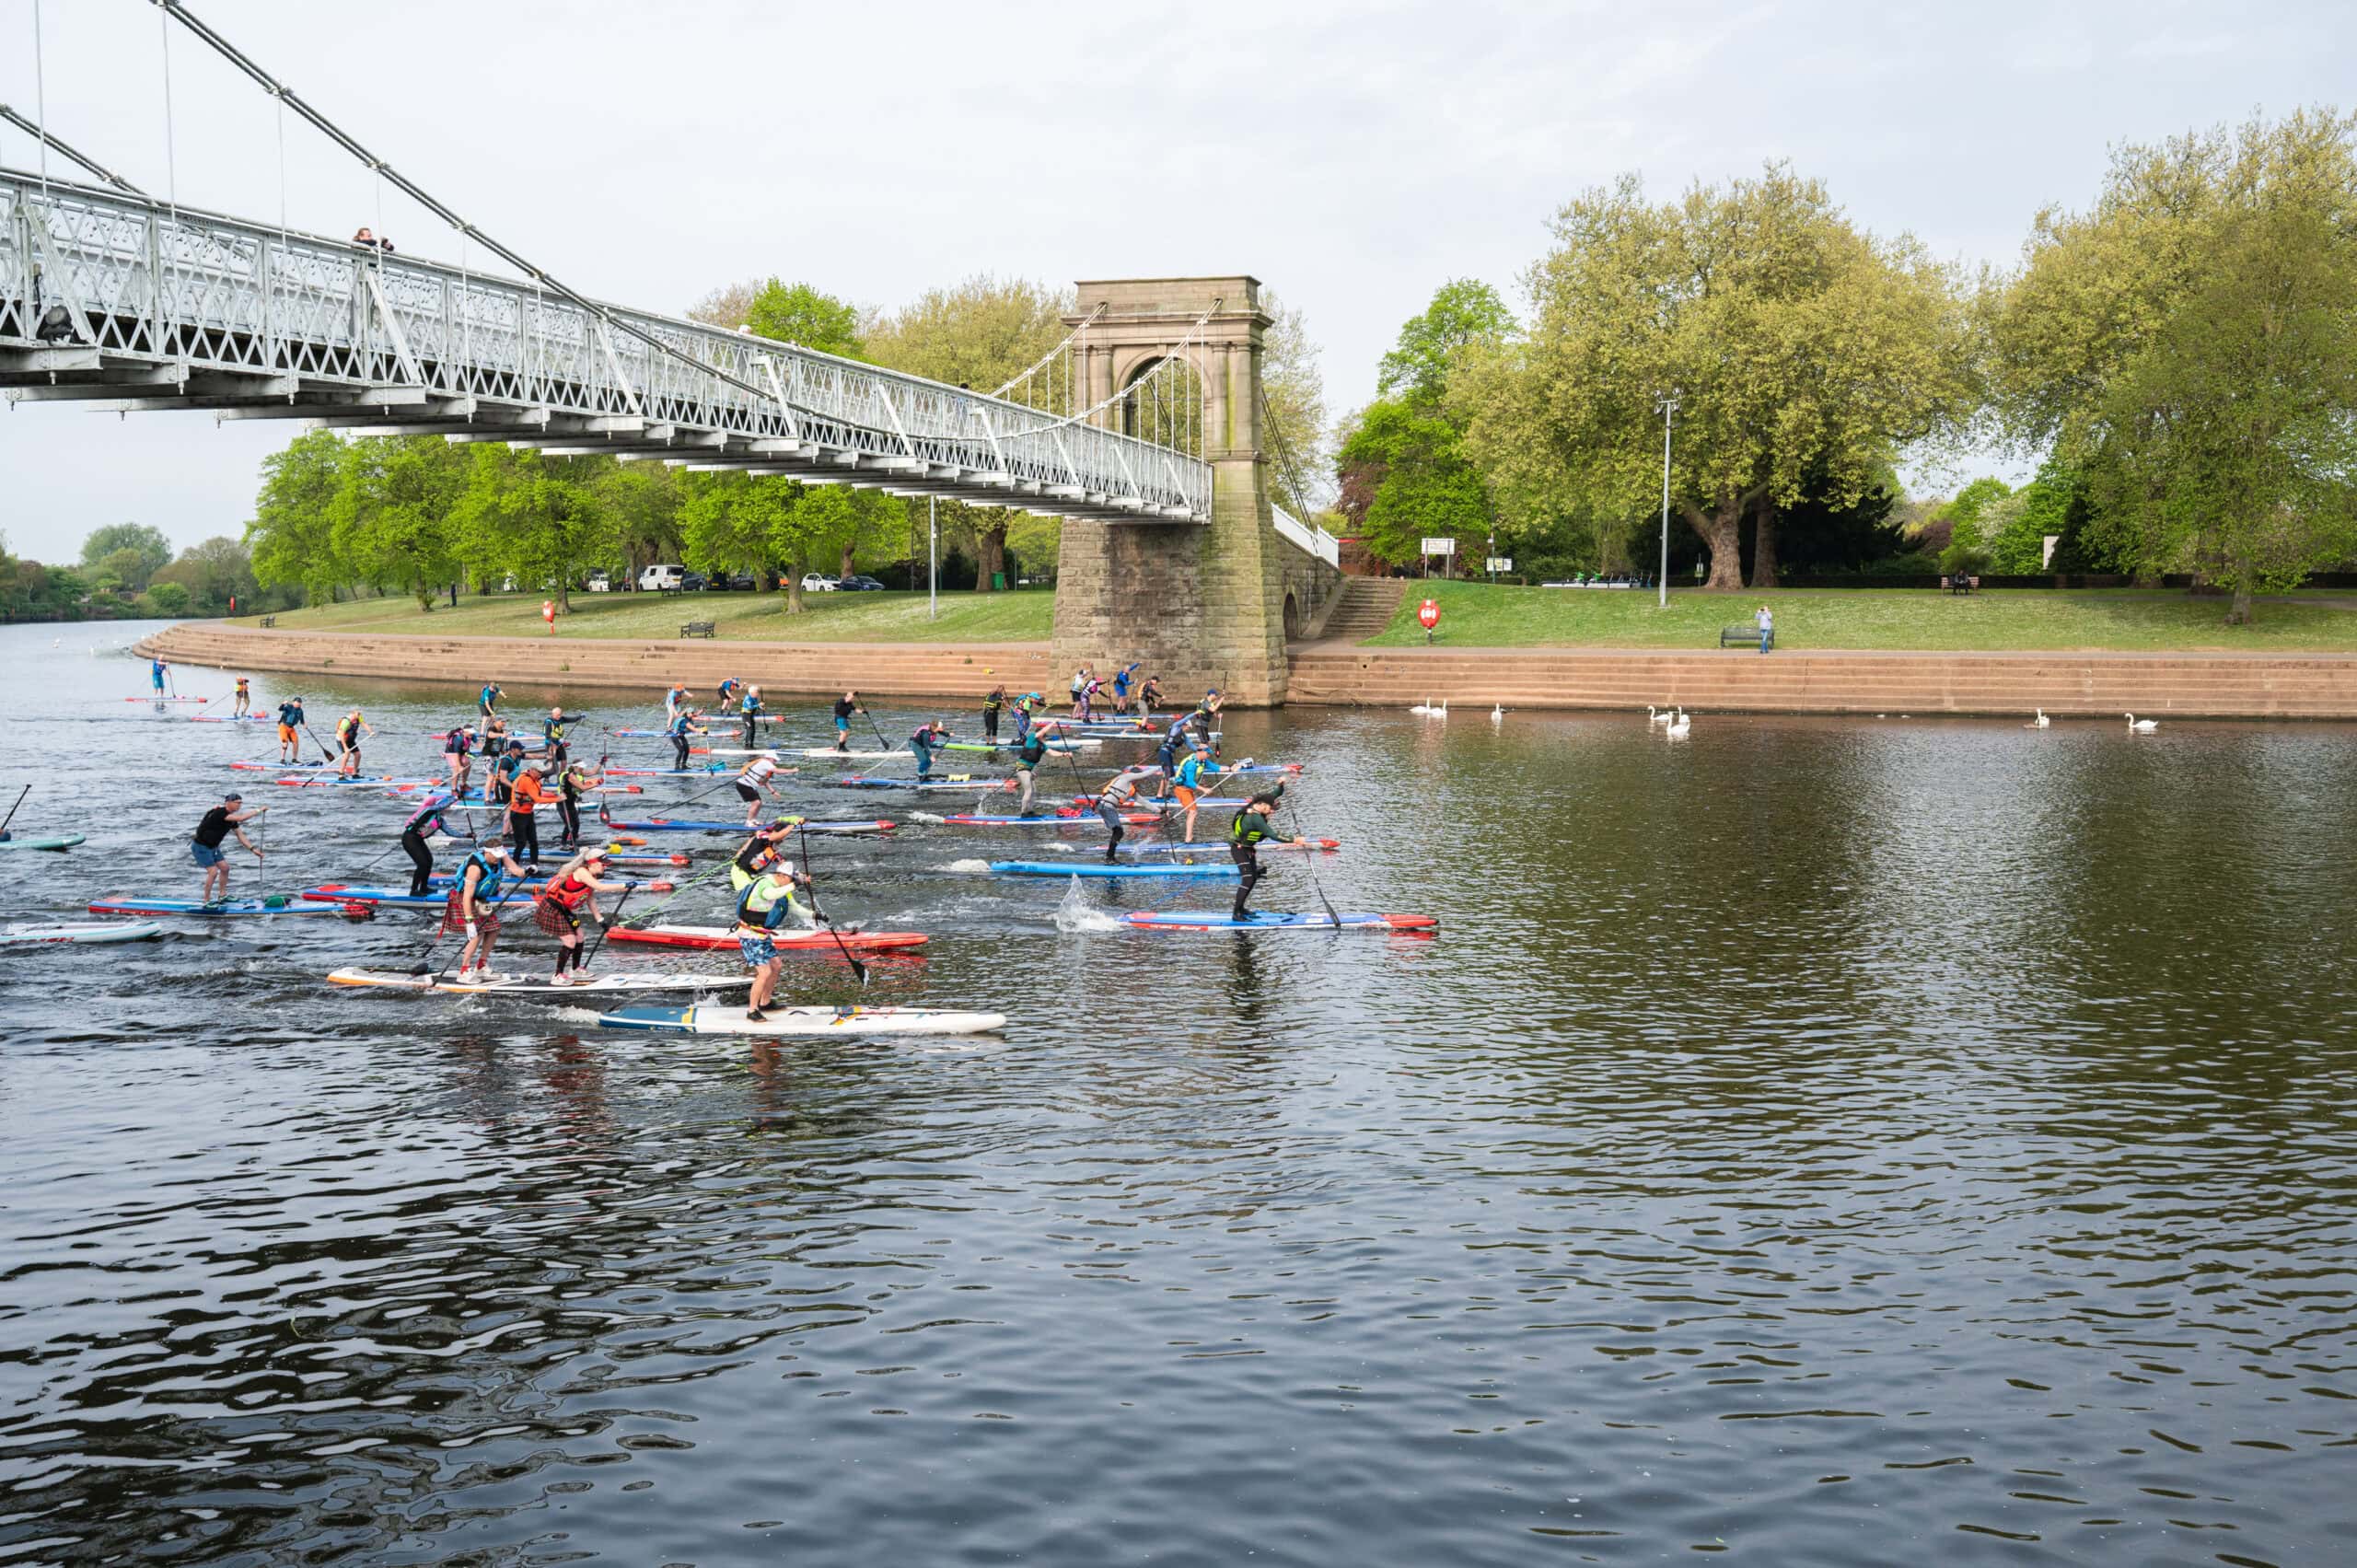
Below are three images, the first is the image I delivered, the second is a cropped version of the same image without any noise reduction and the final one is the same cropped version with noise reduction applied.
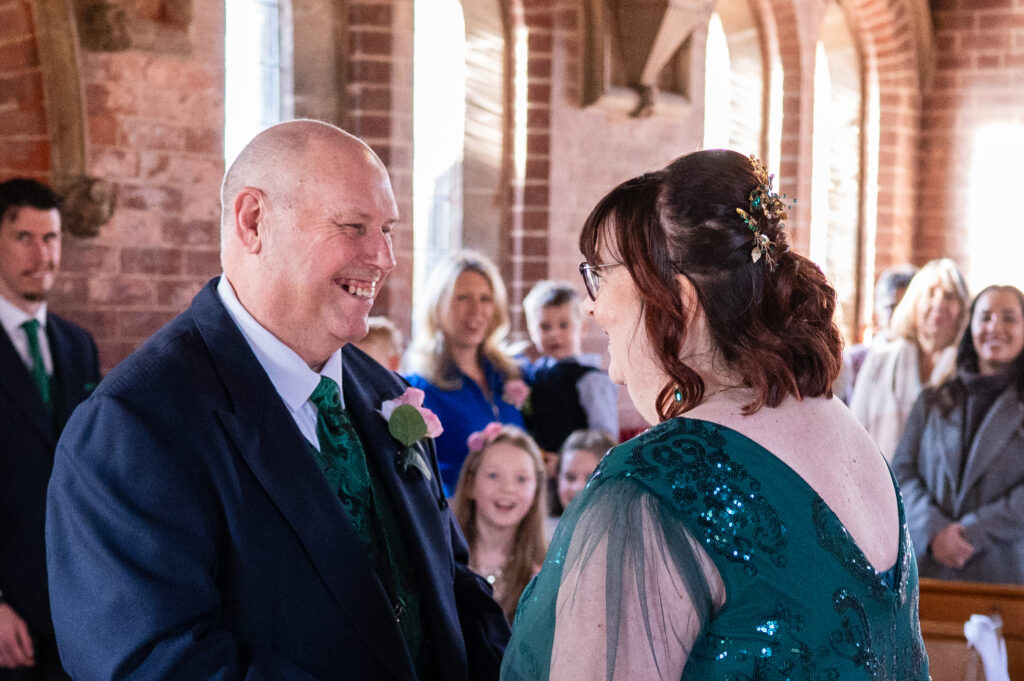

ISO 4000, f 2.8 aperture, 1/500 shutter speed
When to Use Low ISO
Low ISO settings (100–200) work best when:
- Shooting in bright daylight
- Using a tripod for landscapes
- You want the cleanest possible image with minimal noise

When to Use High ISO
High ISO settings (800–6400 or higher) are useful when:
- Shooting indoors without flash
- Capturing action in low light (sports, concerts)
- Photographing at night or in dim conditions where you still want a fast shutter speed
Tips for Getting the Best Exposure
- Start Low, Increase as Needed
Keep ISO as low as possible for the conditions, raising it only when you can’t get enough light with shutter speed and aperture adjustments. - Know Your Camera’s Limits
Different cameras handle high ISO differently—experiment to find the highest ISO you can use before the noise becomes too distracting. - Use Auto ISO Wisely
Many cameras have Auto ISO with a maximum limit you can set. This can save you time but still keep noise under control. - Reduce Noise in Post-Processing
Editing software like Lightroom can reduce noise, but it’s always better to get it right in-camera when you can.
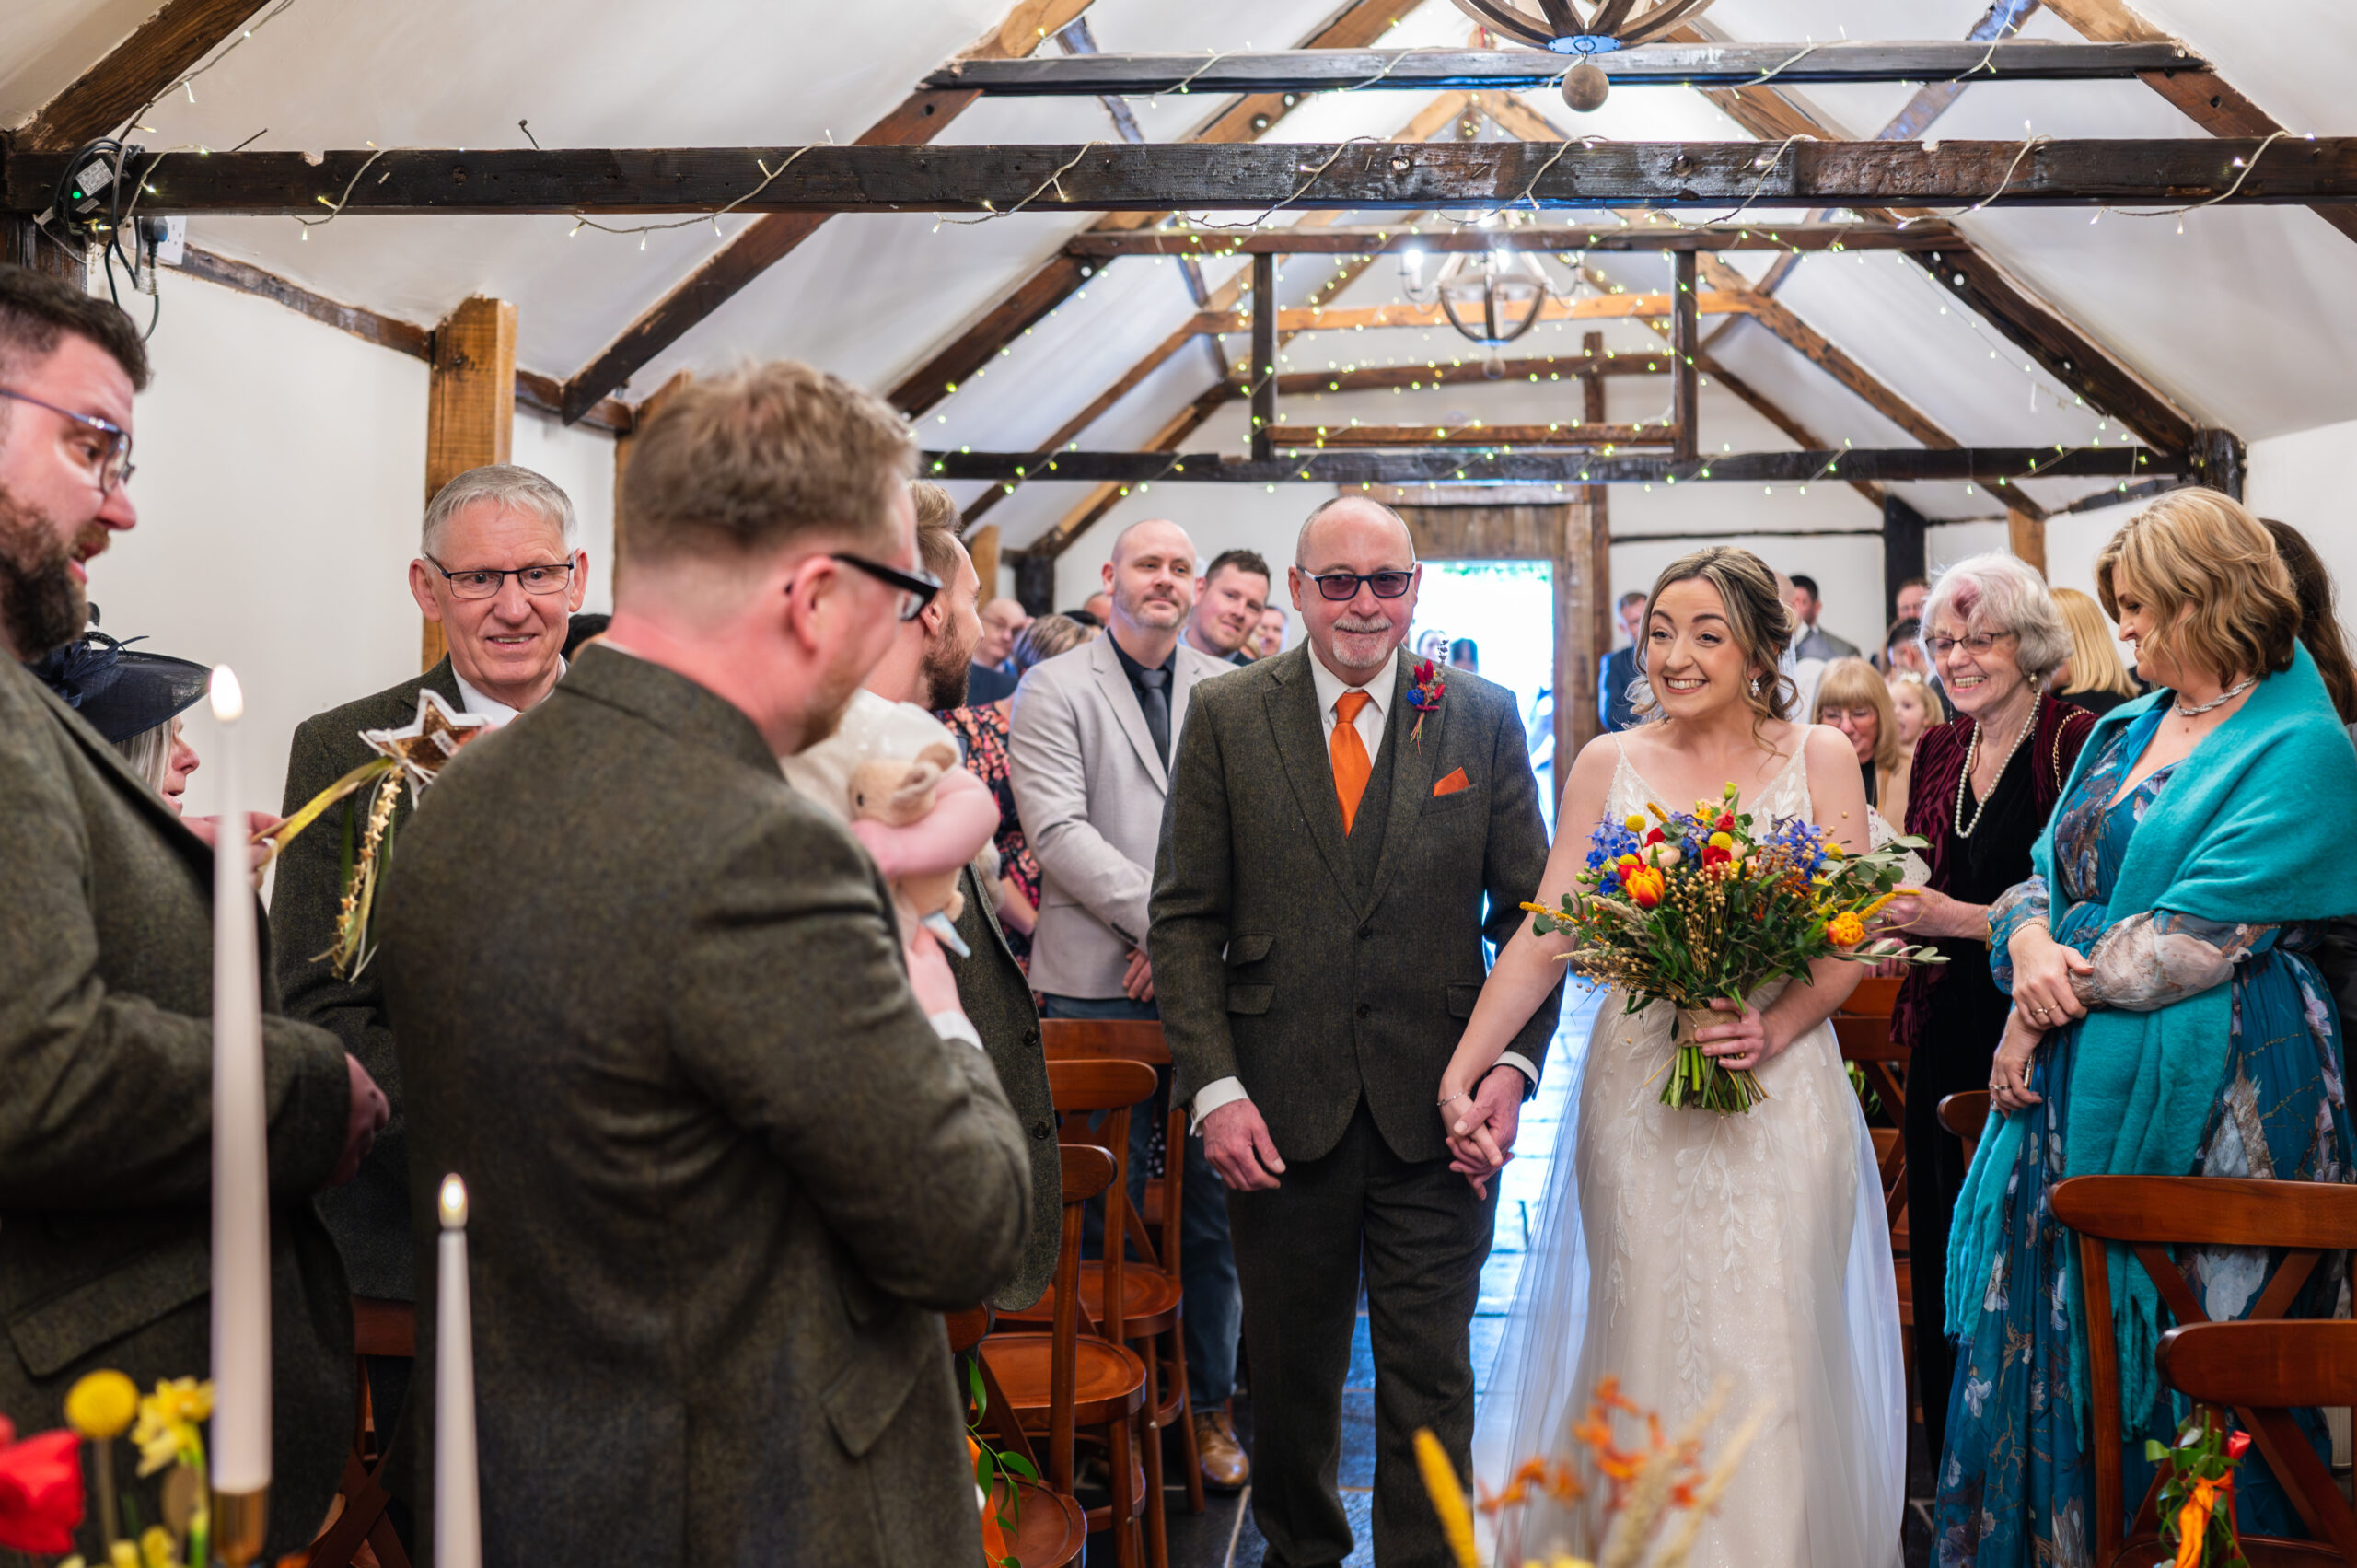
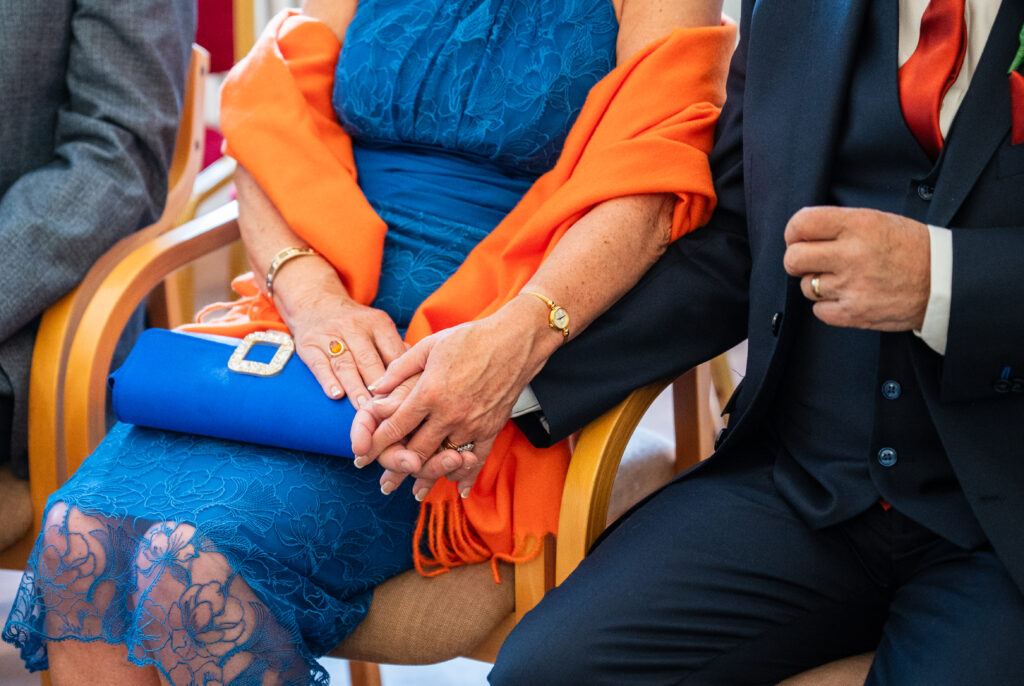
ISO 8000, 1/160 shutter speed, apeture f2.8
A Quick ISO Exercise
Next time you’re out with your camera, try this:
- Shoot the same scene at ISO 100, 800, and 3200.
- Compare them on your computer screen.
- Notice how brightness and noise change with each setting.
You’ll quickly get a feel for the balance between light sensitivity and image quality.
Understanding ISO is key to taking control of your camera and getting the best possible exposure in any light. Once you master it alongside aperture and shutter speed, you’ll have the creative freedom to capture exactly what you see—whether it’s in bright midday sun or under the glow of city lights at night.
Where next on your photography journey?
If you’re ready to keep building your skills, explore more of our photography guides below. Each one dives into a different technique, helping you grow in confidence and creativity with every shot.
- Creative Ways to Use Shadows and Silhouettes in Your Photos

- Shutter Speed Explained: How to Freeze or Blur Motion in Your Photos

- Why You Should Use Aperture Priority Mode for More Creative Control
- Aperture Explained: How to Control Depth of Field and Focus
- Understanding ISO: How to Get the Best Exposure in Any Light
- Using Leading Lines to Guide the Viewer’s Eye in Your Photos
- Mastering the Rule of Thirds: How to Compose Your Shots


